 DoughPrint
Cookie Stamps and Embossers: How to Print One That Leaves a Crisp Imprint
A cutter decides the outline of a cookie. A stamp decides what's on it — and that's the part people photograph. Here's how to design one that presses a clean, readable pattern, and how to keep that pattern alive all the way through the oven.
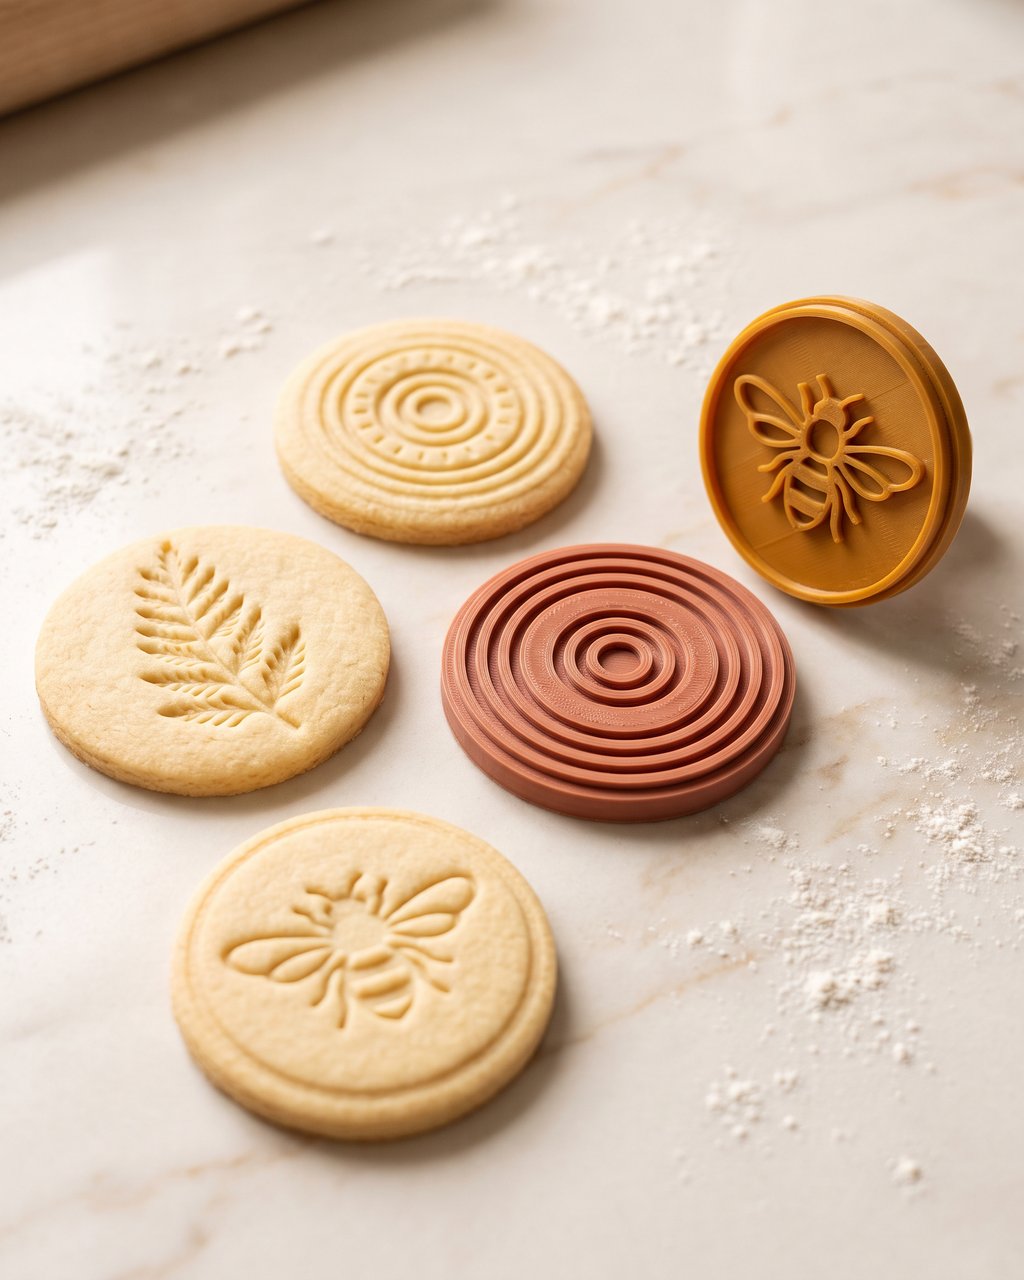
The short answer. A cookie stamp is a solid plate with your design standing proud of it. Press it into rolled dough and you get the design sunk into the surface. Three of the types in the app make one: Imprint Cutter (cuts and embosses in a single press), Stamp Only (a stamp with a grip rim and no blade) and Cutter + Stamp (two pieces, where the stamp drops neatly inside the cutter). Whichever you choose: mirror anything with a direction to it, keep the raised lines roughly as wide as they are deep, and work with cold dough that contains no raising agent.
Stamped cookies are having a moment, and it isn't hard to see why. A plain round of shortbread with a fern pressed into it looks like something from a Scandinavian bakery, takes no icing, no piping bag and no steady hand — and it survives being posted to a friend. The whole effect comes from one printed part that costs about twenty cents of filament.
The design rules are different from a cutter, though. A cutter only has to be sharp. A stamp has to press a pattern into a soft, sticky material and then let go of it, which turns out to be the harder half of the problem.
Stamp, embosser, imprint cutter — what people actually mean
The words get used interchangeably, and one of them is technically wrong in a way that's worth knowing. A stamp presses the design into the surface, which is debossing — the cookie ends up with sunken lines. Everybody in the cookie world still calls the tool an embosser, so we do too. It only matters when you're describing your listing to someone who engraves things for a living.
| You'll see it called | What it is | What the cookie looks like |
|---|---|---|
| Cookie stamp / embosser | Solid plate, design raised on the face | Pattern sunk into the surface |
| Imprint cutter / debosser cutter | Cutting wall with raised detail inside it | Cut shape and pattern, one press |
| Stamp & cutter set | Two separate pieces that fit together | Same result, deeper and crisper |
| Springerle mould | Traditional carved version of the same idea | Deep relief, no leavening allowed |
Which of the three should you print?
All three start from the same drawing — you switch between them with the cutter-type cards in the left panel and the model rebuilds. The differences show up in the dough.
| Type | Best for | The catch |
|---|---|---|
| Imprint Cutter | Speed and batches. One press per cookie, everything lands centred by definition, and there's only one part to print and store. | How deep the detail presses is decided by your dough thickness, not by you: the blade stands above the relief, so on thin dough the pattern barely touches. |
| Stamp Only | Round shortbread, springerle-style patterns, and stamping a whole rolled sheet before you cut it. Gets a grip rim around the design so you have something to hold. | Nothing lines it up for you. On an already-cut cookie you're eyeballing the centring. |
| Cutter + Stamp | Fine detail and deep imprints. Two presses, so each one can do its job properly — and the stamp is built to drop inside the cutter. | Two parts, two prints, and a fit tolerance you may want to tune once for your printer. |
If you're unsure, print the imprint cutter first. It's one file, it's forgiving, and it tells you within one tray whether your design has enough contrast to read at all. Move to the two-piece set when you find yourself wishing the detail were deeper.
Mirror it — or everything comes out backwards
This is the mistake every stamp maker makes exactly once. In the app your relief is built pointing up. To use it, you turn the piece over and press it down. That flip reverses the design left to right, so a name, a date, a monogram or a little "handmade" mark arrives in the dough as its own mirror image.
Use Mirror in the panel before you export. Symmetrical patterns — mandalas, rosettes, snowflakes, most florals — don't care either way, which is exactly why the problem hides until the first time you put letters on something.
Where it's already handled. The Name Cutter Studio and the Multi-Cutter Studio mirror by default and show you the cookie you'll end up with, not the model. In the main editor it's a switch you flip yourself, because plenty of designs are traced from a photo that's already the right way round.
Two numbers decide whether the imprint reads
Under Layers & heights, the Middle · relief slider sets how far your detail stands proud of the plate. Under Wall thickness, the Middle slider sets how wide those raised lines are (1.4 mm by default). Together they decide everything.
| What you're making | Relief height | Line width |
|---|---|---|
| Imprint cutter, everyday designs | Leave it tall — the blade limits the depth | 1.2–1.6 mm |
| Stamp on 4–5 mm rolled dough | 1.5–2.5 mm | 1.2–2 mm |
| Fine, dense pattern (lace, mandala) | 1–1.5 mm | 1–1.2 mm |
| One bold motif, deep and graphic | 2.5–3 mm | 2–3 mm |
| Fondant or clay (not dough) | 0.8–1.5 mm | 0.8–1.5 mm |
The rule of thumb we keep coming back to: a groove reads when it's about as wide as it is deep. Go deeper and narrower than that and the dough grips the sides instead of releasing — you lift the stamp and the pattern comes with it. Go wider and shallower and it looks crisp on the bench and bakes out to a faint suggestion.
Very thin lines have a second problem: they can be too thin to print at all. If your drawing has hairline detail, leave Smart relief check on — after generating, it scans for lines that fell out of the relief and thickens them back into existence rather than letting you discover the gap after the print.
The two-piece set: a stamp that drops into its own cutter
Pick Cutter + Stamp and the app builds both pieces side by side. The stamp isn't a copy of the cutter's outline — it's the cavity: the cutter's inner opening, minus a clearance, so it slides into the wall like a lid.
That nesting is the whole point, and it changes how you work. Cut a shape and leave it sitting inside the cutter. Press the stamp in on top of it. The imprint is perfectly centred because the walls did the centring, and the dough can't spread sideways under the pressure because it's boxed in. Then push the cookie out. It's slower per cookie and noticeably better looking.
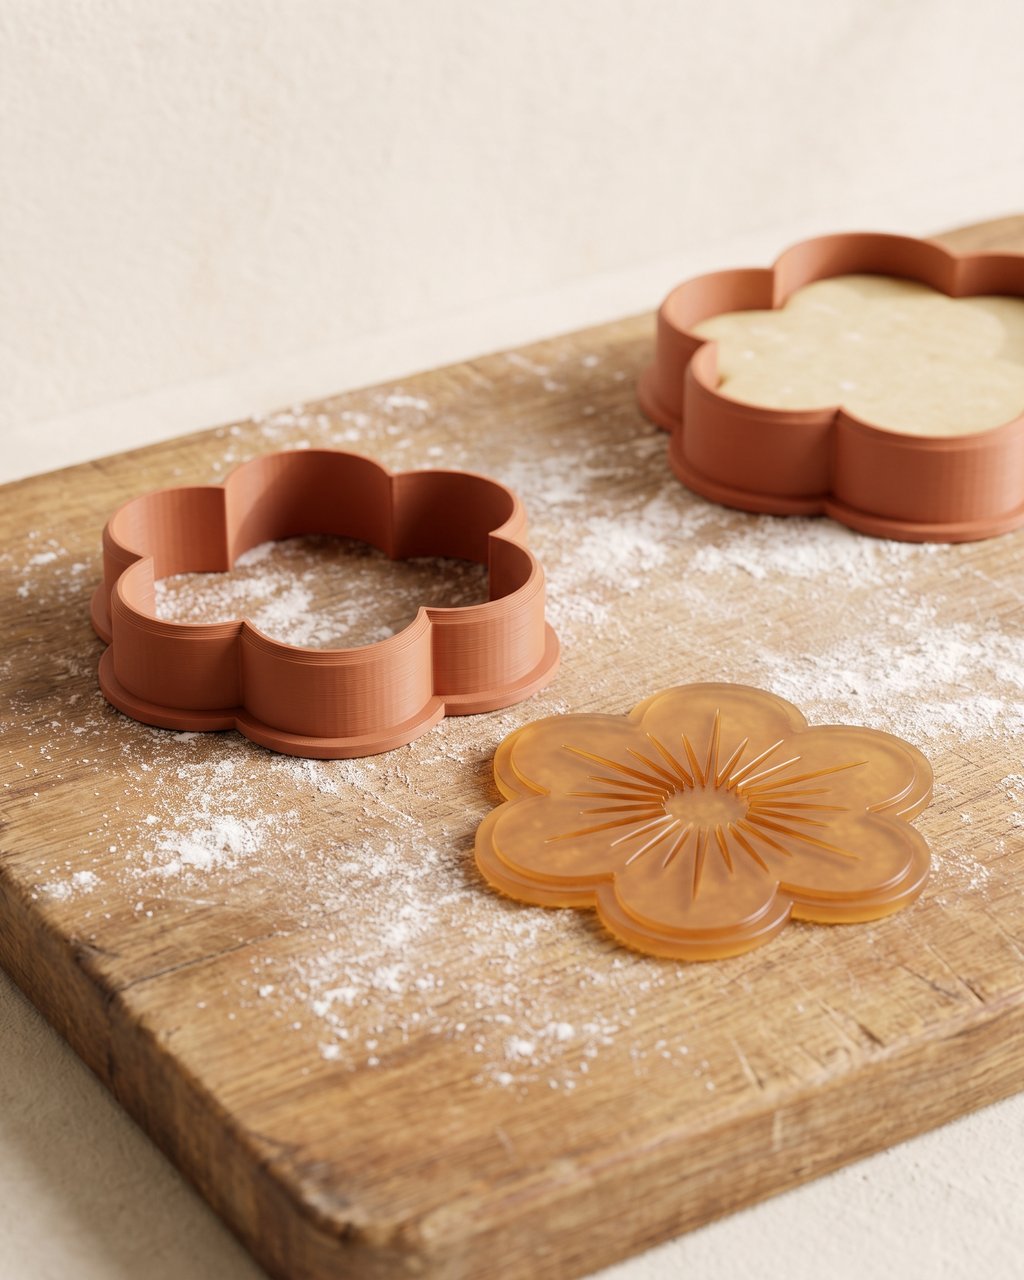
Three settings are worth knowing, in the ⚙ Settings panel at the top left of the 3D view:
- Stamp fit (clearance) — how much room the stamp gets on each side, 0.35 mm by default. That's tuned for a snug slide fit on a well-calibrated printer. If your first layer squishes out a little (elephant's foot) or you're printing in PETG, go to 0.5 mm. If it rattles around, drop to 0.2 mm.
- Delete outer edge — off by default. The cutter already presses your outline into the dough, so the stamp's own outline band draws it a second time, a hair off. Switch this on and the stamp keeps only the inner detail.
- Outline spacing — the grip rim, 5 mm by default. It applies to the standalone Stamp Only and the baking mould: a flat lip sticking out past the design so you have something to hold and pull. The nesting stamp doesn't get one, because a rim would stop it entering the cutter.
Downloading a Cutter + Stamp gives you a ZIP with three files: the cutter, the stamp, and a combined model with both pieces side by side so you can slice the whole set in one go. If the pair is too big for your print bed, the app offers to split it over two plates instead of quietly shrinking your design.
Printing it: finer layers than you'd use for a cutter
A stamp is a small, flat, fast print — but the surface that matters is the side of every raised line, and those sides are made of layers. Whatever step your printer leaves there gets copied faithfully into the dough.
- Layer height 0.12–0.16 mm. Finer than the 0.2 mm you'd happily use for a plain cutter. This is the one setting that visibly changes the cookie.
- Flat on the plate, relief upwards. No supports, nothing overhangs, and the face that touches the dough is made of clean top layers.
- 3 walls, 5 top layers, 15% infill. The top surface is the tool. Don't let it go thin and translucent.
- Brim for anything wide and flat. A 60 mm plate has a lot of edge to curl.
- Print at 100%. Never rescale in the slicer — the relief widths and clearances were all worked out in millimetres, and scaling throws them out together.
PLA is fine here, with the usual caveat that it softens in a hot dishwasher — the details are in our food-safety guide. For everything about wall counts, materials and first-layer adhesion, the print settings guide goes deeper, and if your set includes a cutter, the sharp-edge guide covers keeping that thin tip intact.
Dough is the other half of the job
You can print a perfect stamp and still get mush. What the dough is doing at the moment of the press matters as much as the model.
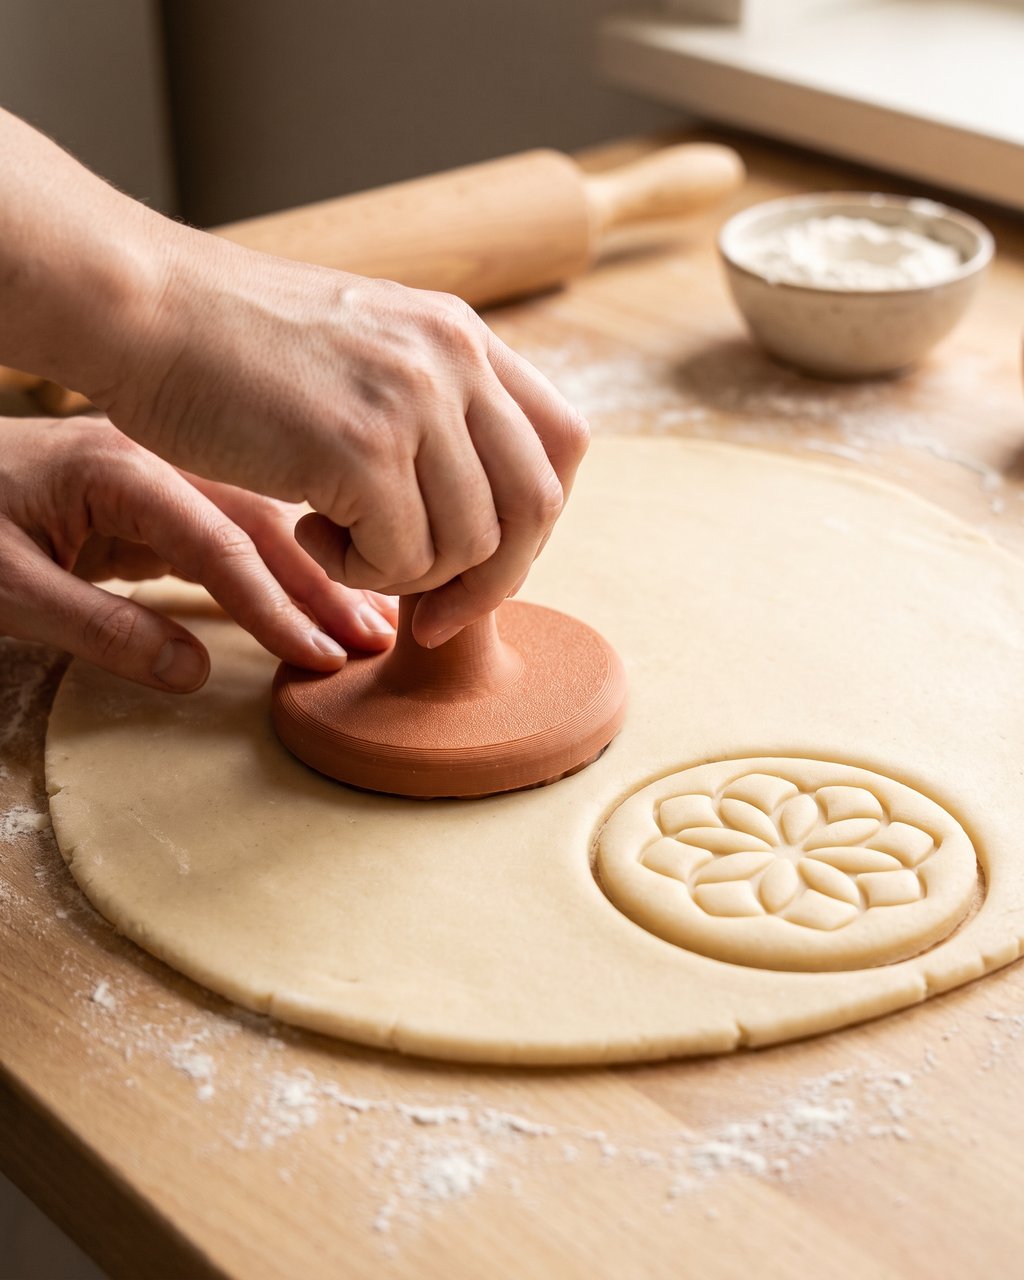
- No raising agent. Baking powder or soda will puff the surface and swallow your pattern in the oven. Shortbread, springerle and no-spread sugar-cookie doughs are what stamps are for.
- Chill before you press. Roll the sheet, then give it ten minutes in the fridge. Cold butter holds an edge; warm butter takes a print and then relaxes out of it.
- Dust the face, not the dough. Flour or icing sugar on the stamp every few presses. For very sticky doughs, a trace of neutral oil wiped over the face works better than flour, which can cake into fine detail.
- Press straight down, lift straight up. Even weight, a second's pause, no twisting and no rocking.
- Freeze the stamped cookies for 15–20 minutes before baking. This is the step most people skip and it's the one that keeps the imprint sharp — the shape sets before the fat melts.
If the pattern still washes out, the fix is usually bolder lines rather than a different oven. Widen the relief lines a few tenths of a millimetre and reprint; a stamp is a twenty-minute print.
The same file presses more than dough
A stamp is a general-purpose embossing tool that happens to be born in a cookie app. The same STL works on fondant and marzipan for cake decorating, on polymer clay for earrings and pendants, on salt dough for kids' ornaments, and on cold-process soap. Clay and fondant want shallower relief than dough — 0.8 to 1.5 mm — and a release agent of some kind, cornflour for fondant, a little water for clay.
It also makes a set look like a set. Give six different shapes the same pressed accent — a single leaf, a starburst, a border of dots — and they read as one family on a plate, which is the idea behind our themed set guide.
Get the two numbers right — deep enough to read, wide enough to let go — mirror anything with a direction, and chill the dough. That's a stamp that works on the first tray. Open the app, drop in a drawing and switch the type to Stamp Only or Cutter + Stamp to see the pieces build.
Frequently asked questions
What is the difference between a cookie stamp and a cookie cutter?
A cutter decides the outline of the cookie and a stamp decides what is on its face. A cutter is a hollow wall that slices all the way through the dough, while a stamp is a solid plate with your design standing proud of it, pressed down to leave a sunken pattern. You can also have both in one piece: an imprint cutter has a cutting wall on the outside and raised detail lines inside it, so a single press cuts the shape and embosses the design at the same time.
Do I need to mirror my design for a cookie stamp?
Yes, for anything that has a direction to it. The relief is built pointing up in the app, but you turn the stamp over to press it into the dough, and that flip reverses the design left to right. Letters, numbers, a signature or a logo all come out backwards if you skip it. Use the Mirror control before you export. Symmetrical patterns like mandalas, rosettes and simple flowers look the same either way, so for those it does not matter.
How deep should the raised detail on a cookie stamp be?
For a stamp you press into rolled dough, 1.5 to 2.5 mm of relief is the sweet spot, set with the Middle slider under Layers and heights. Less than about 1 mm and the pattern bakes flat, more than about 3 mm and the raised lines start punching through 4 to 5 mm dough instead of pressing into it. On an imprint cutter you can leave the relief taller, because the cutting wall stands above it and stops the detail before it goes too far. Keep the lines roughly as wide as they are deep and the dough releases cleanly.
Why does my imprint disappear during baking?
Almost always because the dough is rising. Any baking powder or baking soda in the recipe puffs the surface and swallows the pattern, so use a shortbread or springerle-style dough with no raising agent. The second cause is warm dough: stamp it, then chill the cut cookies in the freezer for 15 to 20 minutes so the edges set before the butter melts. Deeper, wider grooves also survive better than hairline ones, so if a pattern keeps vanishing, make the lines bolder rather than baking it differently.
How do I stop the dough sticking to the stamp?
Cold dough and a dusted stamp solve nearly all of it. Chill the rolled sheet for ten minutes, dust the face of the stamp with flour or icing sugar before every few presses, and press straight down and lift straight up without rocking. For very sticky doughs, wipe the face with a trace of neutral oil instead of flour. If it still sticks in one particular spot, that part of the design is too deep and too narrow, so widen the line or lower the relief a few tenths of a millimetre.
Press your own pattern
Drop in a drawing, switch the type to Stamp, and download a stamp that fits its cutter to the tenth of a millimetre.
Open the app →