 DoughPrint
Turn Your Kid's Drawing into a Real Cookie Cutter (Yes, Really)
That dinosaur on the fridge deserves better than a magnet. Here's how to turn a child's drawing — wobbly lines and all — into a 3D-printed cutter that bakes their creation into actual cookies.
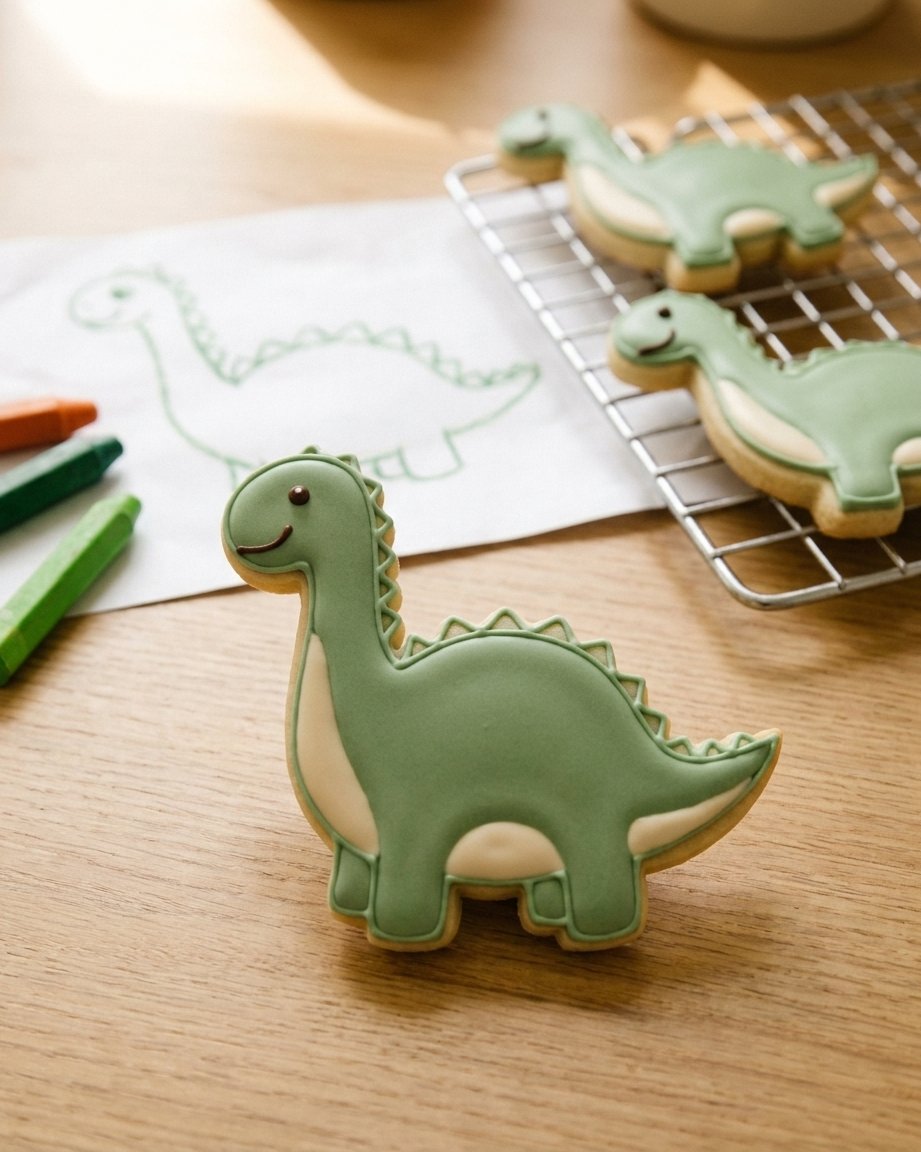
Every parent knows the moment: your kid slides a drawing across the table, beaming, and you're holding a green crayon dinosaur with a too-long neck and legs that don't quite match. It goes on the fridge. Eventually it goes in a box. But there's a third option most people never consider — that drawing is already a cookie cutter design. It just doesn't know it yet.
The same image-to-cutter workflow that traces professional line art works on crayon monsters, marker rockets and felt-tip family portraits. And honestly? The results are better. Here's the whole process, from fridge door to cooling rack.
Why kids' drawings make the best cutters
It sounds backwards, but hear it out. A store-bought dinosaur cutter looks like every other dinosaur cutter on earth. Your kid's dinosaur has a personality — the crooked smile, the five spikes where anatomy says there should be more, the tail that curls the wrong way. Nobody else's cookies look like that, because nobody else's four-year-old drew them.
Kids also draw in exactly the style a cutter wants: bold, closed outlines with a few big interior details. No shading, no fussy textures, no fine hatching that would never survive in dough. A confident crayon line translates almost one-to-one into a cutting wall. Where adult references usually need simplifying, a kid's drawing often just needs cleaning up.
The keepsake angle — a drawing fades in a box; a cutter gets used every birthday. Print the year on the side wall and you've made an heirloom for the price of a few grams of filament.
The confidence angle — for a kid, watching their own drawing come out of the oven as a real cookie is pure magic. It says: what you make matters enough to become a thing.
Step 1: Pick a drawing that wants to be a cookie
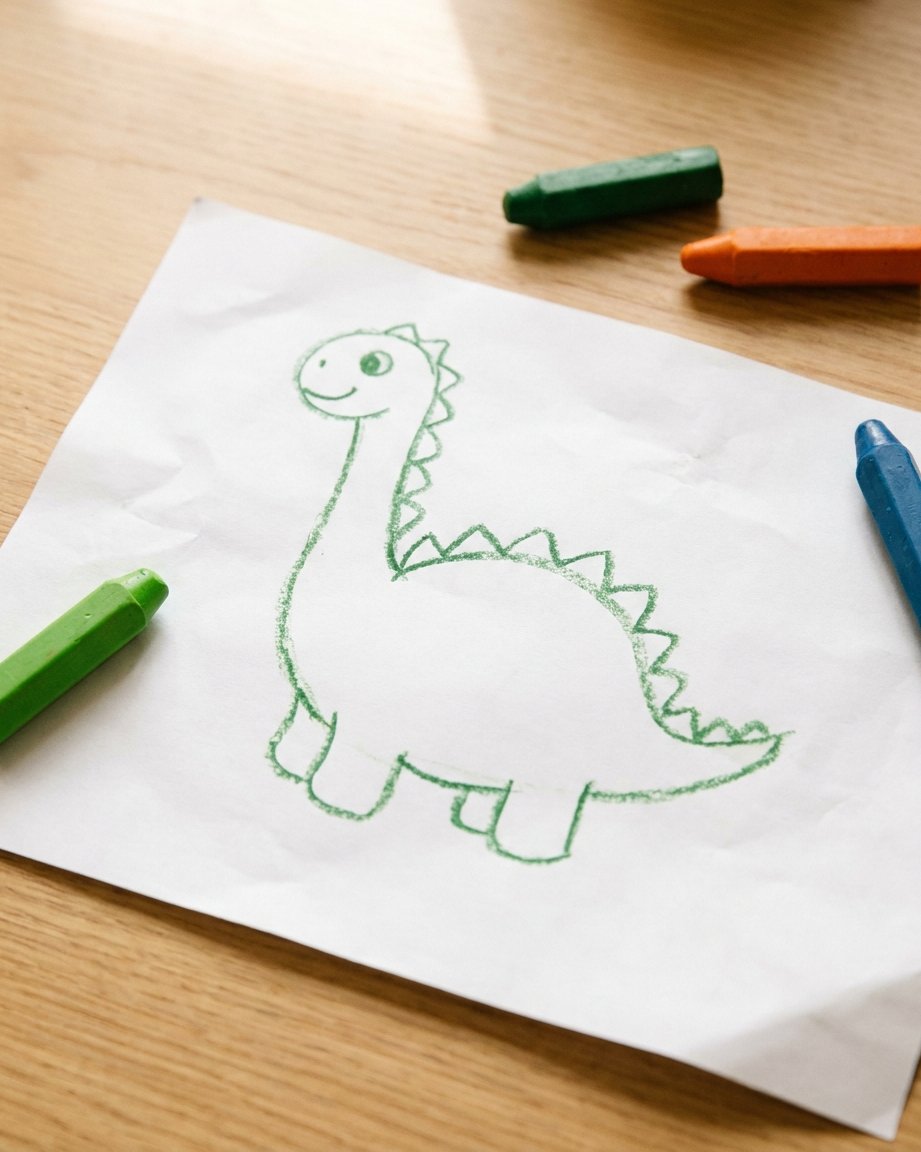
Not every masterpiece is cutter material, so raid the fridge door with these criteria in mind:
- One connected shape. A dinosaur, a cat, a house, a rocket — great. A scene with a sun in one corner and a dog in the other is really three cutters, not one. (Nothing stops you making all three as a matching set, though.)
- A closed outline. The line should come back around and meet itself. Most kids close their shapes instinctively; small gaps are fine, the tracing step bridges them.
- Bold strokes beat faint ones. Crayon and marker trace beautifully. A light pencil sketch may need one pass with a dark marker over the main lines first — ideally by the artist, so the wobble stays authentic.
- A few interior details, not forty. An eye, a smile, some spikes: perfect. Every scale individually drawn: pick the best five and let icing do the rest.
Step 2: Photograph it like it matters (because it does)
The tracer can only work with what the camera sees, and a good capture takes twenty seconds. Lay the drawing flat and smooth the paper as much as small hands allow. Shoot from directly above — straight down, not at a heroic angle — in bright, even daylight without shadows falling across the paper. Fill the frame with the drawing and make sure the main lines are sharp.
Crumples and coffee stains are usually no problem; the trace keys on the dark lines, not the paper. But a shadow of your phone across the sheet will confuse things, so step to the side and let the light come in clean. A flatbed scanner works too, if the drawing hasn't been glitter-glued to something.
Step 3: Let AI clean it up — without cleaning away the kid
Upload the photo and the app traces the outline into a cutting wall and turns the interior lines into raised relief that embosses the dough. This is the step where you have one important creative decision to make: how much to clean up.
The AI simplify pass is great at removing noise — stray marks, paper texture, the ghost of an erased first attempt. Let it do that. But resist the urge to iron out the wobble itself. If the smile is crooked, the cookie's smile should be crooked. The charm of the whole project lives in the difference between "a dinosaur" and "their dinosaur." Clean, don't correct.
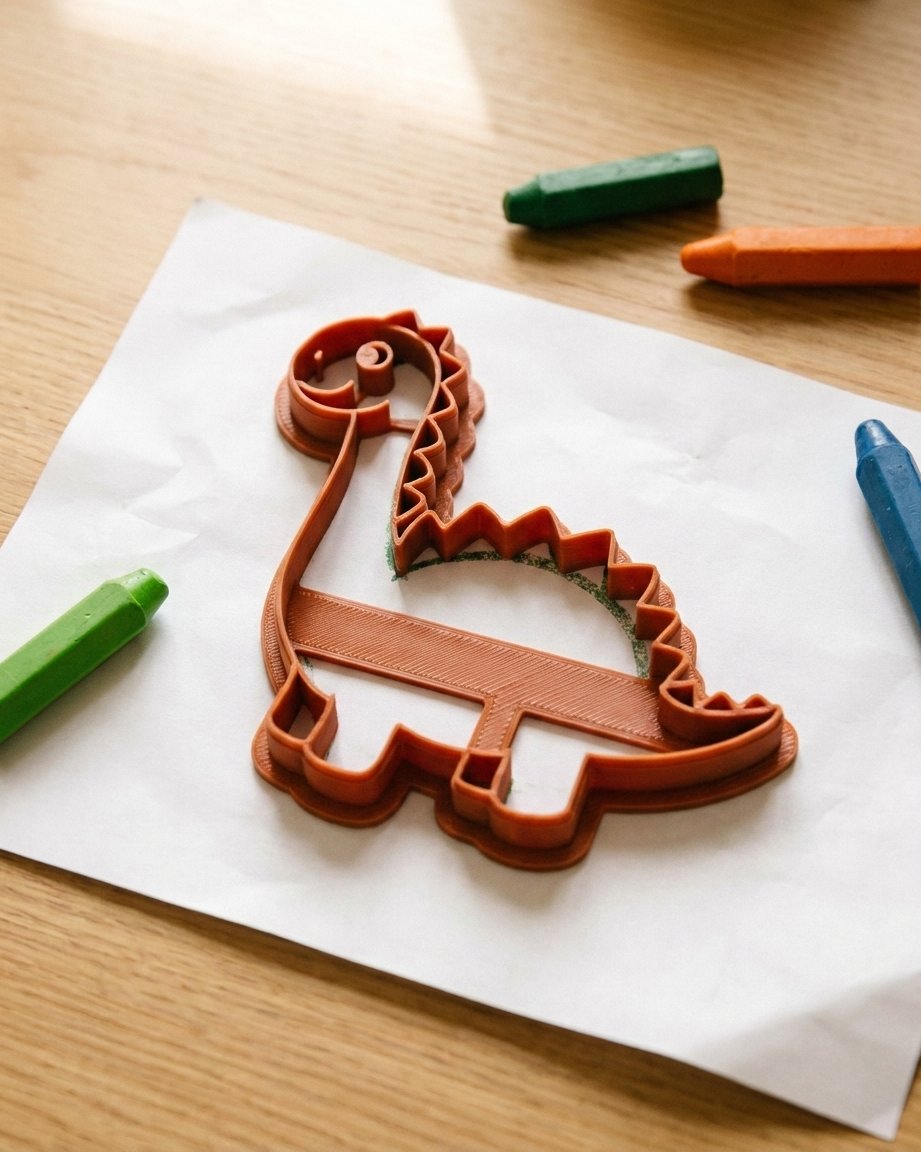
Details that come out too thin to survive as dough — a single-crayon-width whisker, say — can be thickened with the uniform line thickness option, which makes every relief line the same sturdy width while keeping the shapes themselves untouched.
Step 4: Keep the cut in one piece
One technical rule matters more than all the others: the cookie has to lift out of the cutter as a single connected piece. Kids love drawing floating elements — a sun above the dinosaur, a detached balloon on a string, polka dots around the edges. Anything fully enclosed or floating free will fall out of the dough on its own.
Two easy fixes, same as for any design: move enclosed shapes into the relief layer so they emboss instead of cutting through, or let the editor add small connectors that bridge separate regions. The app flags and fixes most of these automatically, but give the preview one look before printing — especially for drawings with lots of floating decorations.
Step 5: Size it, print it
Kid drawings tend to be big — A4-filling big — so the size step matters. Somewhere between 70 and 90 mm on the longest edge works well: large enough to keep the wobbly character readable, small enough to bake evenly. Below 60 mm, thin details start merging and you lose exactly the quirks you're doing this for.
Printing is the standard recipe — PLA or PETG, fine layers for a smooth cutting edge, a couple of solid walls. The full rundown lives in our print settings guide. A cutter this size is typically an hour or two of printing: start it after dinner, and it's waiting on the kitchen table like a small miracle at breakfast.
Step 6: Bake it together
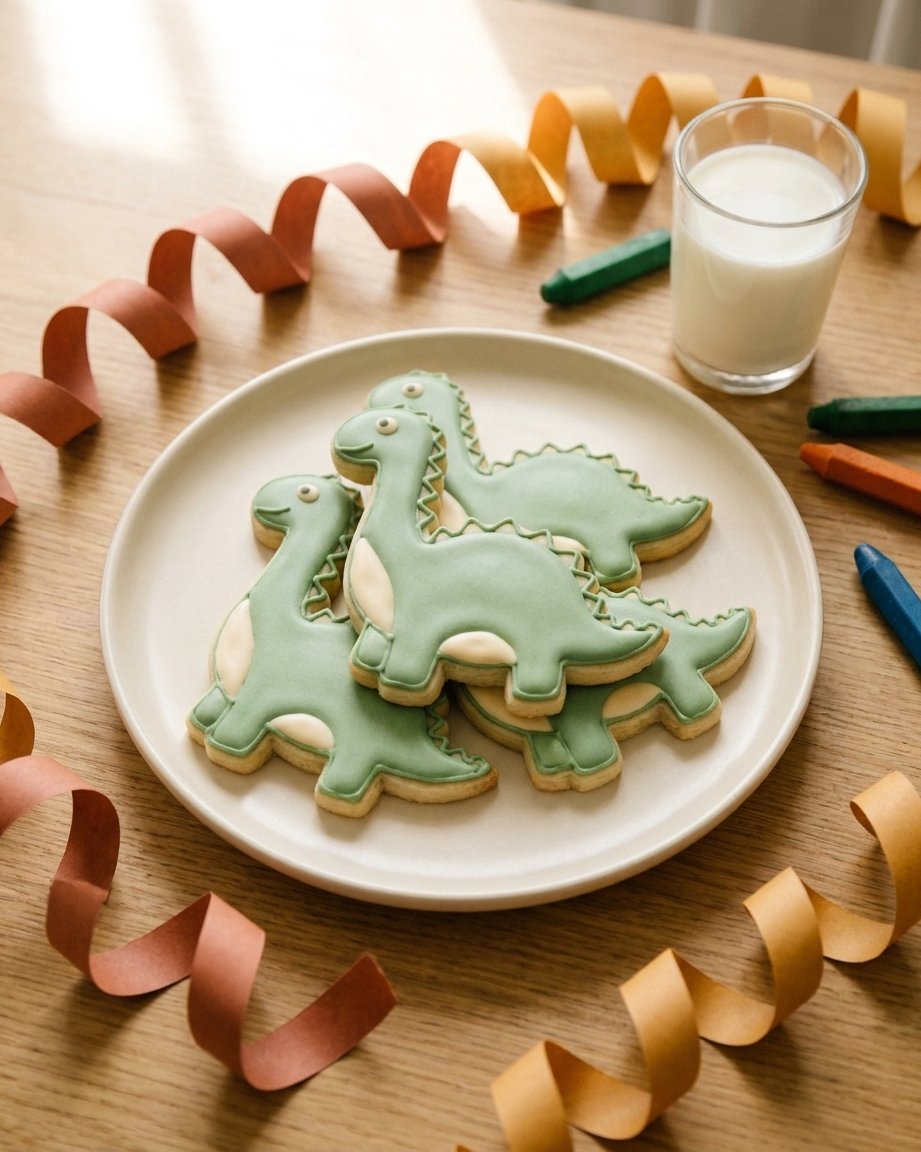
This is the part they'll remember. Let the artist press the cutter, peel the extra dough and — crucially — do the quality control. Match the icing to the original crayon colors so the cookie reads instantly as the drawing: green body, cream belly, one determined dot of an eye. The embossed relief lines are ready-made guides, so even shaky piping lands in the right place.
Some occasions where this lands especially well:
- Birthday parties — the birthday kid's own drawing, served as the party treat.
- Grandparent gifts — the cutter plus a dozen cookies, wrapped with the original drawing. Good luck topping that.
- A yearly tradition — one drawing becomes one cutter every year. By age twelve you've got a drawer that tells the whole story, and cutters that still bake.
- Classroom bake sales — a whole class of drawings as a set is a fundraiser nobody forgets. Add each kid's name cutter and it's a complete kit.
The fridge door is a fine gallery, but it's a temporary one. A drawing that becomes a cutter gets a second life — pressed into dough, decorated at a messy kitchen table, eaten with milk and asked for again next weekend. Photo → trace → keep the wobble → one connected cut → print → bake together. The whole thing takes an evening, and the look on their face is not available in any store.
Frequently asked questions
Which kids' drawings work best as cookie cutters?
One connected shape with a closed, bold outline and a few big interior details — a dinosaur, a cat, a rocket. A scene with a sun in one corner and a dog in the other is really several cutters, and dozens of tiny strokes won't survive at cookie scale.
Does a faint pencil drawing work?
Crayon and marker trace beautifully; a light pencil sketch may need one pass with a dark marker over the main lines first — ideally by the artist, so the wobble stays authentic. Then photograph it flat, straight from above, in even daylight without shadows.
What size should a kid's-drawing cutter be?
Between 70 and 90 mm on the longest edge: large enough to keep the wobbly character readable, small enough to bake evenly. Below 60 mm, thin details start merging and you lose exactly the quirks you're doing this for.
What about floating parts like a sun or balloons?
Anything fully enclosed or floating free will fall out of the dough on its own. Move those elements into the relief layer so they emboss instead of cutting through, or let the editor add small connectors — it flags and fixes most of these automatically, but give the preview one look before printing.
There's a masterpiece on your fridge right now
Snap a photo, upload it, and watch the drawing become a real, printable cookie cutter.
Open the app →